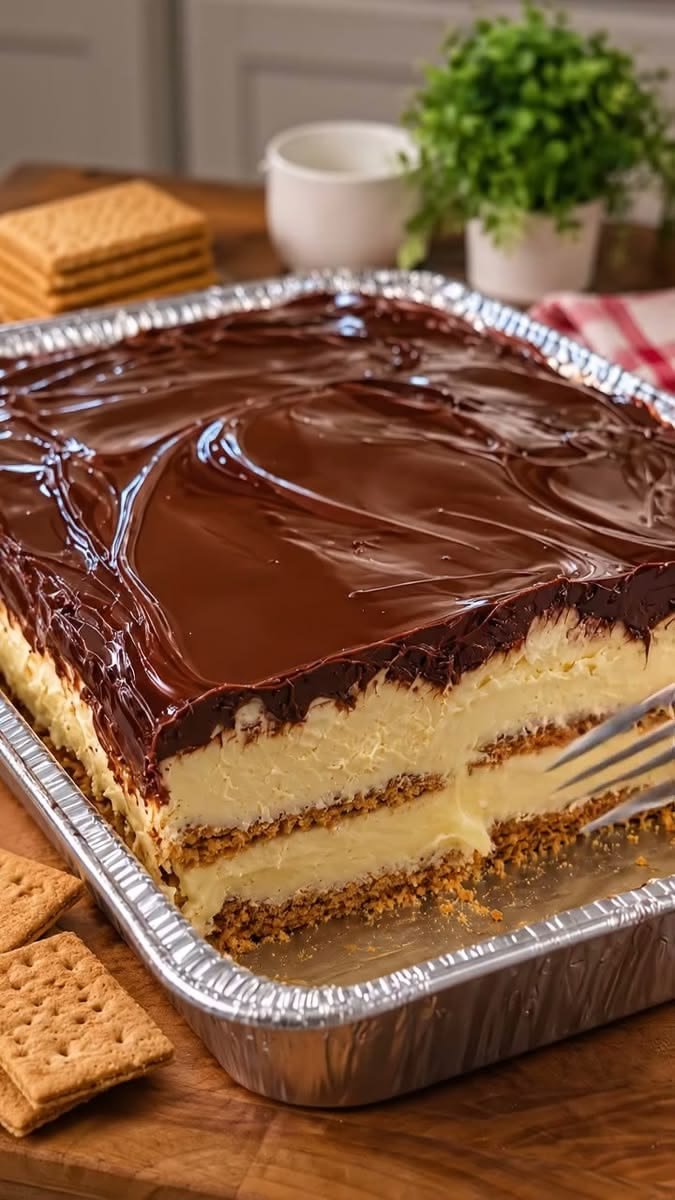
No-Bake Chocolate Eclair Cake is a rich, creamy, and irresistible layered dessert made with crisp graham crackers, smooth vanilla pudding filling, fluffy whipped topping, and a glossy chocolate frosting. It has all the delicious flavors of a traditional chocolate éclair without the need for baking.
The graham crackers soften in the refrigerator, creating tender cake-like layers that taste remarkably similar to pastry. This easy dessert is perfect for family gatherings, birthdays, potlucks, holidays, and special occasions.
1. Recipe Overview
| Detail | Information |
|---|---|
| Prep Time | 20 minutes |
| Cook Time | 0 minutes |
| Chilling Time | 6–8 hours |
| Total Time | Approximately 8 hours 20 minutes |
| Servings | 12 |
| Difficulty | Easy |
| Cuisine | American |
| Cooking Method | No-bake |
| Main Ingredients | Graham crackers, pudding, whipped topping, chocolate |
| Flavor | Creamy, chocolatey, sweet, and rich |
2. Ingredients
For the cake layers:
1 box (approximately 14–16 ounces) graham crackers
2 packages (3.4 ounces each) instant vanilla pudding mix
3 cups cold whole milk
1 container (8 ounces) frozen whipped topping, thawed
1 teaspoon vanilla extract
For the chocolate topping:
1 cup semisweet chocolate chips
½ cup heavy whipping cream
2 tablespoons unsalted butter
2 tablespoons powdered sugar, optional
½ teaspoon vanilla extract
Optional garnishes:
Chocolate shavings
Mini chocolate chips
Cocoa powder
Crushed graham crackers
A small amount of whipped cream
3. Step-by-Step Instructions
Step 1: Prepare the pudding filling
In a large mixing bowl, add both packages of instant vanilla pudding mix.
Pour in the cold milk and whisk for approximately 2 minutes until the mixture begins to thicken.
Add the vanilla extract and mix again until everything is well combined.
Allow the pudding to rest for approximately 3–5 minutes so it can become thicker.
Step 2: Add the whipped topping
Gently fold the thawed whipped topping into the prepared vanilla pudding.
Use a spatula and mix carefully until the filling becomes smooth, fluffy, and creamy.
Avoid vigorous mixing because it can deflate the whipped topping.
Step 3: Prepare the baking dish
Choose a 9 × 13-inch rectangular baking dish.
Arrange a single layer of graham crackers across the bottom of the dish.
Break a few crackers into smaller pieces to fill any empty spaces.
The crackers should form an even base.
Step 4: Add the first pudding layer
Spread approximately half of the vanilla pudding mixture evenly over the graham crackers.
Use a spatula to reach the edges and create a smooth, even layer.
Step 5: Add the second graham cracker layer
Arrange another layer of graham crackers over the pudding filling.
Try to keep the crackers close together so the dessert holds its shape when sliced.
Step 6: Add the remaining filling
Spread the remaining pudding mixture evenly over the second graham cracker layer.
Smooth the surface with a spatula.
Step 7: Add the final graham cracker layer
Place another complete layer of graham crackers over the pudding mixture.
This final layer creates the base for the rich chocolate topping.
Step 8: Prepare the chocolate topping
Place the chocolate chips in a heatproof bowl.
In a small saucepan, gently heat the heavy cream and butter until hot but not boiling.
Pour the hot cream mixture over the chocolate chips.
Let it sit for approximately 2 minutes.
Stir slowly until the chocolate melts completely and becomes smooth and glossy.
Add powdered sugar if desired, followed by vanilla extract.
Allow the chocolate mixture to cool slightly until it is spreadable but still pourable.
Step 9: Add the chocolate topping
Pour the chocolate topping over the final graham cracker layer.
Spread it gently using a spatula until the entire surface is covered.
Make sure the chocolate reaches the edges for a beautiful finished appearance.
Step 10: Refrigerate the cake
Cover the baking dish with plastic wrap or a suitable lid.
Place it in the refrigerator for at least 6–8 hours.
For the best results, refrigerate overnight.
During chilling, the graham crackers soften and absorb moisture from the pudding, creating a tender cake-like texture.
Step 11: Slice and serve
Remove the cake from the refrigerator when ready to serve.
Use a sharp knife to cut it into squares.
For cleaner slices, wipe the knife between cuts.
Serve chilled and enjoy!
4. Taste and Texture
Creamy filling: The vanilla pudding and whipped topping create a light, fluffy center.
Soft cake-like layers: Graham crackers absorb moisture and become tender during refrigeration.
Rich chocolate topping: The smooth chocolate layer adds a deep cocoa flavor.
Sweet vanilla flavor: Vanilla extract enhances the creamy pudding.
Perfect combination: Every slice combines soft layers, creamy filling, and rich chocolate.
5. Ingredient Substitutions
| Original Ingredient | Substitute |
|---|---|
| Graham crackers | Digestive biscuits |
| Instant vanilla pudding | Instant French vanilla pudding |
| Whole milk | 2% milk |
| Whipped topping | Homemade stabilized whipped cream |
| Semisweet chocolate chips | Dark chocolate chips |
| Heavy cream | Whipping cream |
| Unsalted butter | Salted butter, with adjusted salt |
| Vanilla extract | Vanilla bean paste |
Important: Use instant pudding rather than cook-and-serve pudding unless you adapt the preparation instructions.
6. Delicious Recipe Variations
1. Chocolate Eclair Cake with Chocolate Pudding
Replace vanilla pudding with chocolate pudding for an extra-rich chocolate dessert.
2. Strawberry Chocolate Eclair Cake
Add thinly sliced fresh strawberries between the pudding layers for a fruity flavor.
3. Peanut Butter Chocolate Eclair Cake
Mix ½ cup creamy peanut butter into the pudding filling before folding in the whipped topping.
4. Cookies and Cream Eclair Cake
Add 1 cup crushed chocolate sandwich cookies to the pudding filling.
5. Caramel Chocolate Eclair Cake
Drizzle caramel sauce over the pudding layers before adding the final chocolate topping.
6. Coffee Chocolate Eclair Cake
Add 1 teaspoon instant espresso powder to the chocolate topping for a delicious mocha flavor.
7. Dark Chocolate Eclair Cake
Use dark chocolate chips with a higher cocoa percentage for a less sweet, deeper chocolate taste.
7. What to Serve with Chocolate Eclair Cake
This dessert is delicious on its own, but it also pairs wonderfully with:
Fresh strawberries
Raspberries
Fresh blueberries
Vanilla ice cream
Hot coffee
Cappuccino
Unsweetened tea
Fresh fruit salad
A small serving of whipped cream
8. Storage and Meal Prep
Refrigerator Storage:
Cover the cake tightly with plastic wrap or store it in an airtight container.
Keep refrigerated at 40°F (4°C) or below.
Enjoy within 3–4 days for the best quality.
Keep the dessert chilled until serving.
Freezing Instructions:
Cut the cake into individual portions.
Wrap each piece tightly.
Place the portions in a freezer-safe container.
Freeze for approximately 1 month for best quality.
Thaw overnight in the refrigerator before serving.
The texture may change slightly after freezing and thawing.
Make-Ahead Instructions:
This cake is ideal for preparing ahead of time.
You can assemble it the evening before a party and refrigerate overnight. The additional chilling time helps the graham crackers soften and allows the layers to set.
9. Approximate Nutrition Information
Estimated per serving, assuming 12 servings and the ingredients listed above.
| Nutrient | Approximate Amount |
|---|---|
| Calories | 390–440 kcal |
| Protein | 5–7 g |
| Carbohydrates | 48–55 g |
| Fat | 19–23 g |
| Fiber | 1–2 g |
| Sugar | 30–38 g |
| Sodium | 300–400 mg |
Nutrition values vary depending on the brands of graham crackers, pudding mix, whipped topping, and chocolate.
10. Frequently Asked Questions
Q1: Why is my No-Bake Chocolate Eclair Cake runny?
The pudding may not have thickened properly, or the dessert may not have chilled long enough. Use instant pudding with the recommended amount of cold milk and refrigerate for at least 6–8 hours.
Q2: Can I make this cake one day ahead?
Absolutely! Making it a day ahead is actually recommended. Overnight refrigeration allows the graham crackers to soften and the layers to become more cohesive.
Q3: Can I use homemade whipped cream instead of whipped topping?
Yes. Use approximately 2 cups of whipped cream whipped to stiff peaks. Stabilized whipped cream is preferable if the cake will be stored for several days.
Q4: Can I use digestive biscuits instead of graham crackers?
Yes. Digestive biscuits work well and create a similar soft, cake-like texture after chilling.
Q5: Does this cake need to be baked?
No. This is a completely no-bake dessert. The refrigerator does all the work of setting the layers and softening the crackers.
Q6: How long does No-Bake Chocolate Eclair Cake need to chill?
It needs at least 6–8 hours. Overnight refrigeration usually gives the best texture and makes slicing easier.
Q7: Can I use store-bought chocolate frosting?
Yes. You can spread approximately one container of prepared chocolate frosting over the final cracker layer. For easier spreading, warm it slightly according to its package directions.
Q8: How do I get clean slices?
Make sure the cake is thoroughly chilled. Use a sharp knife and wipe it clean between slices.
11. Troubleshooting Guide
| Problem | Possible Cause | Solution |
|---|---|---|
| Runny pudding filling | Too much milk | Measure milk carefully |
| Crackers remain crunchy | Not enough chilling time | Refrigerate overnight |
| Chocolate topping is too thick | Too much chocolate or not enough cream | Add a little warm cream |
| Chocolate topping is too runny | Mixture is too warm | Allow it to cool before spreading |
| Cake falls apart | Layers have not fully set | Chill longer before slicing |
| Filling is lumpy | Pudding was not whisked properly | Whisk pudding thoroughly before folding |
| Cake tastes too sweet | Sweet ingredients combined | Use semisweet or dark chocolate |
12. Chef’s Tips for the Perfect Eclair Cake
Always use cold milk when preparing instant pudding.
Do not add extra milk because it can make the filling too soft.
Fold the whipped topping gently into the pudding.
Arrange graham crackers in tight, even layers.
Make sure the chocolate topping is slightly cooled before spreading.
Refrigerate overnight whenever possible.
Use a sharp knife for neat, attractive slices.
Keep the cake refrigerated until serving.
Choose semisweet chocolate if you prefer a less sugary topping.
Allow the chocolate topping to set completely before cutting.
13. Serving and Presentation Ideas
For a beautiful presentation, cut the chilled cake into equal squares and place each piece on a dessert plate.
Finish with chocolate shavings, a light dusting of cocoa powder, or a few fresh strawberries.
For parties and celebrations, arrange the slices on a large serving platter and garnish with small swirls of whipped cream.
You can also serve each slice with fresh raspberries or a little extra chocolate sauce.