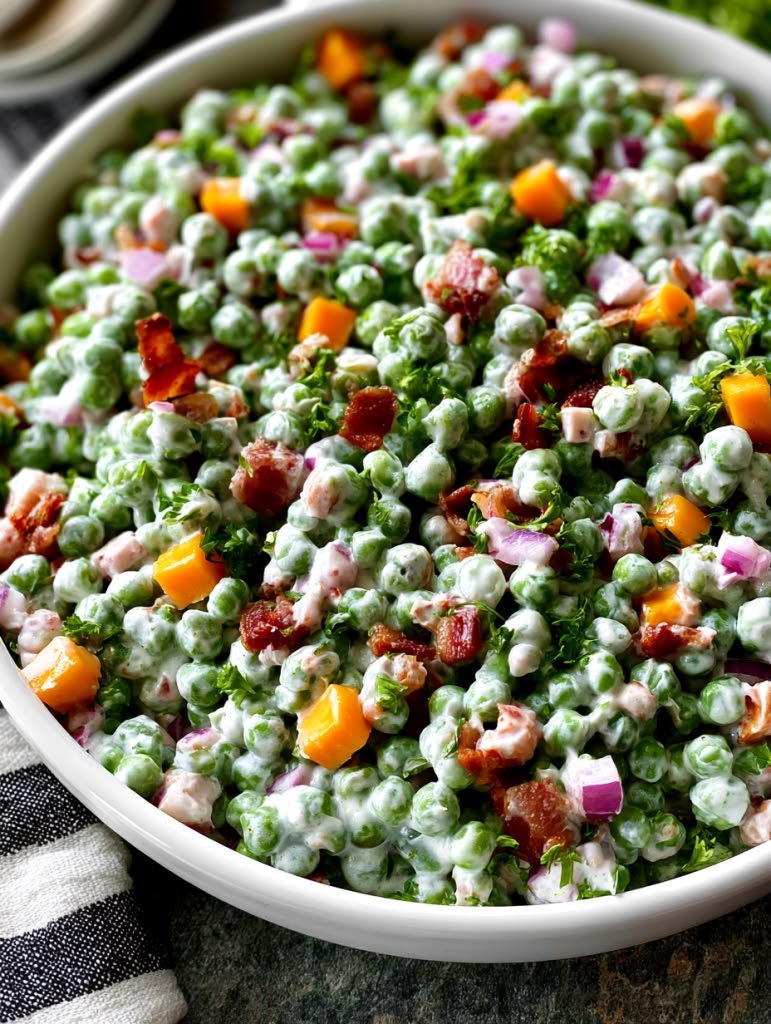
A delicious, refreshing, and creamy Bacon Pea Salad loaded with sweet green peas, crispy bacon, sharp cheddar cheese, and a tangy homemade dressing. This easy side dish is perfect for BBQs, potlucks, family dinners, picnics, and holiday gatherings.
Recipe Overview
Bacon Pea Salad is a classic crowd-pleasing side dish that combines tender green peas with crunchy bacon, creamy dressing, and savory cheese.
The sweetness of the peas balances perfectly with salty bacon and tangy dressing. Best of all, it takes just minutes to prepare and can be made ahead of time!
Recipe Information
Prep Time: 15 minutes
Cook Time: 10 minutes
Chilling Time: 1 hour
Total Time: 1 hour 25 minutes
Servings: 6–8
Difficulty: Easy
Course: Side Dish
Cuisine: American
Calories: Approximately 280–320 per serving
Ingredients
For the Salad
4 cups frozen green peas, thawed
8 slices bacon, cooked until crispy and crumbled
1 cup sharp cheddar cheese, cut into small cubes
½ small red onion, finely diced
¼ cup chopped green onions
For the Creamy Dressing
½ cup mayonnaise
¼ cup sour cream
1 tablespoon apple cider vinegar
1 teaspoon granulated sugar
½ teaspoon garlic powder
½ teaspoon black pepper
¼ teaspoon salt
Step-by-Step Instructions
Step 1: Prepare the Green Peas
Remove the frozen peas from the freezer.
Place them in a bowl and allow them to thaw.
Drain any excess water.
Pat gently with paper towels if necessary.
Important: Do not boil the peas. Thawed peas provide the perfect tender texture while keeping their beautiful green color.
Step 2: Cook the Bacon
Place bacon slices in a skillet over medium heat.
Cook until golden brown and crispy.
Transfer to a paper towel-lined plate.
Allow the bacon to cool completely.
Crumble into small bite-sized pieces.
Reserve a little bacon for topping the finished salad.
Step 3: Prepare the Vegetables
Finely dice the red onion.
Chop the green onions.
Cut the cheddar cheese into small cubes.
Keep the ingredients relatively uniform in size so every bite contains a delicious combination of flavors.
Step 4: Make the Creamy Dressing
In a medium mixing bowl, combine:
Mayonnaise
Sour cream
Apple cider vinegar
Sugar
Garlic powder
Black pepper
Salt
Whisk until the mixture becomes smooth and creamy.
Taste the dressing and adjust the seasoning if needed.
Step 5: Combine the Salad Ingredients
In a large mixing bowl, add:
Thawed green peas.
Crispy crumbled bacon.
Cheddar cheese cubes.
Diced red onion.
Chopped green onions.
Gently toss everything together.
Step 6: Add the Dressing
Pour the creamy dressing over the salad ingredients.
Gently fold everything together using a large spoon.
Make sure the peas and other ingredients are evenly coated.
Avoid stirring too aggressively because the peas can become mushy.
Step 7: Chill the Salad
Cover the mixing bowl with plastic wrap or a lid.
Refrigerate for at least 1 hour.
Allow the flavors to blend together.
Stir gently before serving.
Step 8: Garnish and Serve
Transfer the salad to a serving bowl.
Top with reserved crispy bacon, a few cheddar cubes, and chopped green onions.
Serve chilled for the best flavor and texture.
Taste and Texture
Sweet: Green peas provide a naturally sweet flavor.
Savory: Crispy bacon adds a delicious smoky taste.
Creamy: Mayonnaise and sour cream create a rich dressing.
Tangy: Apple cider vinegar balances the creamy ingredients.
Cheesy: Sharp cheddar adds a bold, savory flavor.
Crunchy: Red onion and crispy bacon provide texture.
Tips for the Best Bacon Pea Salad
Use frozen sweet peas for the best flavor.
Thaw and drain peas thoroughly to prevent watery dressing.
Cook bacon until crispy for the best texture.
Let bacon cool before mixing it into the salad.
Use sharp cheddar cheese for a stronger cheesy flavor.
Dice onions finely so they don’t overpower the salad.
Chill for at least one hour before serving.
Reserve some bacon to sprinkle on top just before serving.
Fold gently to keep the peas intact.
Taste and adjust the dressing before combining everything.
Ingredient Substitutions
| Ingredient | Substitute |
|---|---|
| Frozen peas | Fresh cooked and chilled peas |
| Bacon | Turkey bacon |
| Cheddar cheese | Monterey Jack |
| Sour cream | Plain Greek yogurt |
| Mayonnaise | Avocado mayonnaise |
| Red onion | White or sweet onion |
| Apple cider vinegar | White wine vinegar |
Delicious Variations
1. Ranch Bacon Pea Salad
Add 1 teaspoon ranch seasoning to the dressing for a delicious ranch-inspired flavor.
2. Loaded Bacon Cheddar Pea Salad
Add extra cheddar cheese, crispy bacon, and chopped green onions.
3. Healthy Greek Yogurt Pea Salad
Replace most or all of the mayonnaise and sour cream with plain Greek yogurt.
4. Creamy Garlic Bacon Pea Salad
Add freshly minced garlic and a little extra black pepper.
5. Southern-Style Pea Salad
Add chopped hard-boiled eggs and a little sweet pickle relish.
6. Crunchy Pea Salad
Add diced celery for additional crunch and freshness.
What to Serve With Bacon Pea Salad
Grilled BBQ chicken
Honey-glazed chicken thighs
Slow cooker pulled pork
Grilled burgers
Roasted turkey
Baked ham
BBQ ribs
Fried chicken
Garlic butter potatoes
Grilled vegetables
Meal Prep and Storage
Refrigerator:
Store in an airtight container.
Keep refrigerated at 40°F (4°C) or below.
Best enjoyed within 3 days for freshness.
Stir gently before serving.
Make Ahead:
You can prepare the dressing, vegetables, and peas separately a day ahead. Combine them closer to serving time for the best texture.
Keep crispy bacon separate and add it just before serving.
Freezing:
Freezing is not recommended because mayonnaise-based dressing can separate and the peas may become mushy after thawing.
Approximate Nutrition Information
Per serving, assuming 8 servings. Values vary depending on ingredients and brands.
| Nutrient | Amount |
|---|---|
| Calories | 280–320 kcal |
| Protein | 11–14 g |
| Carbohydrates | 15–18 g |
| Fat | 20–24 g |
| Fiber | 4–5 g |
| Sugar | 5–7 g |
| Sodium | 450–600 mg |
Frequently Asked Questions
Q1: Can I use canned peas instead of frozen peas?
Yes, but drain them very well. Canned peas are softer, so fold them gently into the salad.
Q2: Do I need to cook frozen peas?
No. Simply thaw them completely, drain, and use them in the salad.
Q3: Can I make Bacon Pea Salad the night before?
Absolutely! Prepare it the night before and refrigerate. For the best crunch, add the crispy bacon just before serving.
Q4: Why is my pea salad watery?
Excess moisture from thawed peas or vegetables can thin the dressing. Drain and dry the peas thoroughly before mixing.
Q5: Can I make this salad without mayonnaise?
Yes! Use plain Greek yogurt or a combination of Greek yogurt and sour cream.
Q6: How long should I chill the salad?
At least one hour is recommended, although 2–3 hours allows the flavors to develop even more.
Troubleshooting Guide
| Problem | Solution |
|---|---|
| Watery salad | Drain peas thoroughly |
| Dressing too thick | Add a little sour cream |
| Dressing too tangy | Add a small amount of sugar |
| Salad too salty | Use less bacon and salt |
| Peas becoming mushy | Fold ingredients gently |
| Bacon losing crispiness | Add bacon just before serving |
| Salad tastes bland | Adjust pepper, vinegar, and seasoning |
Chef’s Special Tips
Always use completely thawed and drained peas.
Freshly cooked bacon gives the salad its best smoky flavor.
Sharp cheddar provides a delicious contrast to sweet peas.
Don’t skip the chilling time.
Add fresh bacon immediately before serving for maximum crunch.
A little Dijon mustard in the dressing adds another layer of flavor.
Serving and Presentation Ideas
Serve the Bacon Pea Salad in a large chilled glass bowl or a beautiful white serving dish.
Sprinkle crispy bacon crumbles over the top, add a few cheddar cubes, and finish with freshly chopped green onions.
For gatherings, serve in individual small bowls or cups for easy portions.