Learn how to make kefir at home from scratch using probiotic capsules or sachets.
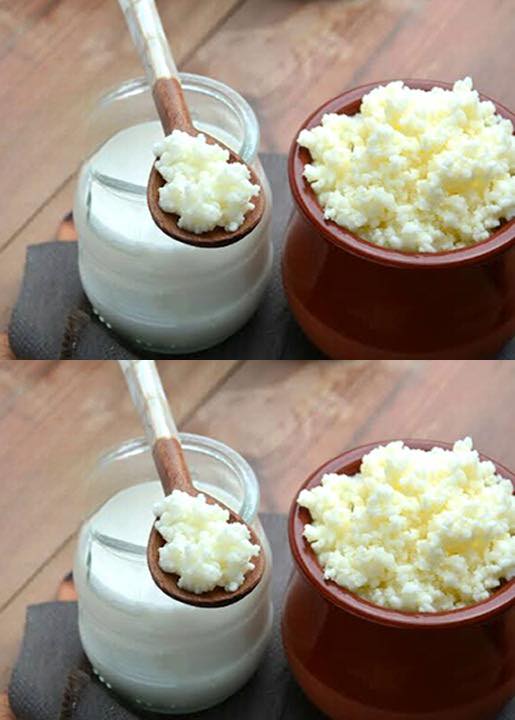
Kefir is a slightly acidic liquid, well known for its probiotic benefits.
Although it resembles yogurt, it is more powerful when it comes to intestinal health, thanks to the wide variety of probiotic strains that make up its culture.
These good bacteria aid digestion, strengthen immunity, and bring balance to the body as a whole.
Since it’s not always easy to get kefir grain donations—the process is often bureaucratic or time-consuming—you can start your own culture at home from scratch. It’s easy, practical, and it works!
What you will need:
- 1 sterilized glass container
- 1 probiotic capsule or sachet (e.g. Probiatop, Baby or other with several strains)
- Pure whole milk (no preservatives, preferably type A or fresh milk)
- 1 piece of light cloth, voile or napkin
- 1 elastic band to hold the cloth
Step by step:
Choose your milk. Use milk that’s as natural as possible, without preservatives or additives. Fresh or whole milk is best.

Place the milk in the sterilized glass jar (do not fill completely).
Add half the sachet or just 1 capsule of the probiotic. Do not use the entire sachet to avoid excessive fermentation. Mix gently with a clean spoon.
Cover the jar with the cheesecloth or napkin and secure with a rubber band. This allows the kefir to “breathe” without letting in insects or dust.
Leave the jar at room temperature, away from direct light, for 24 to 48 hours. The time will depend on the weather—on warmer days, 30 hours is usually sufficient.
After fermentation, you will see a liquid separated from the rest: this is the whey.

It can be used to prepare other fermented drinks, bread dough, cakes or kombucha.
Mix the contents lightly and strain through a sieve to separate any kefir grains that may have formed. If small grains appear, your culture has worked!
Transfer the grains to a new glass jar, add more milk, and cover again with the cheesecloth. Let it ferment as before.
Now, you are starting your own continuous kefir cycle with the grains you grew yourself.
Once your grains have multiplied, you can donate them! To do so, place them in a small container with a little milk and store them in the refrigerator. The cold slows fermentation and preserves the grains until they can be donated.

Final tips:
- Fermented kefir can be consumed pure, made into mousse, yogurt, cheese, or used as a base for healthy recipes.
- If you want a thicker version, do a second fermentation or use the strained liquid for thicker recipes.
With this simple process, you can start your own kefir production at home, naturally, economically and without relying on donations.
Try it and enjoy all the benefits of this wonderful probiotic drink!